Finalizing the NYC Micro Dwellings Project
Last week, I finally reached a milestone and completed all of the exterior and interior renderings of the NYC Micro Dwellings, which captures my vision of the project. After each rendering was complete, I went through each Photoshop file and made very slight modifications that generally included adding people to the exterior renderings, correcting brightness and contrasts of the interior renderings, and cleaning up any minor mistakes that I forgot to modify in the Revit model.
My focus this week for the NYC Micro Dwellings is to compile and organize all of the line drawings into a digital folder for future use in my portfolio and on my website. Just like most of my architect friends and colleagues, I used to procrastinate and never get around to organizing my final drawings and renderings for a project. Then, I’ll find myself in need of a specific file, only to find names like “Final render”, “Final final render”, and “Final render for real this time”.
NYC Micro Dwellings’ Section Perspective
Usually, the first drawing that I compile into my folder of final drawings would be a floor plan, but for this project, I decided to work on a section perspective rendering. This made more sense with my work flow because I was already in “rendering mode” where I was creating a similar setting in each rendering. If I decided to put the section perspective off for a week, I wouldn’t have the same mindset and motivation as I did in my rendering phase.
So I set up a camera on the 6th floor, north of the building, and faced the camera’s perspective south to look towards the center. I turned on the section box in the properties menu of Revit and adjusted the section cut to capture the central atrium space and residential units. After rendering the view, I was surprised at the quality and quality of the drawing. I brought it into Photoshop along with an exported line drawing and adjusted the brightness, contrast, and details.
Section perspective renderings are my favorite drawings to make because it adds depth and clarity to a drawing that would otherwise be flat. Personally, I’ve found section perspectives, plan perspectives, and renderings, of course, to be the easiest drawings to explain to a client because they’re able to envision themselves in the spaces as I explain the details, materials, and procession through spaces.
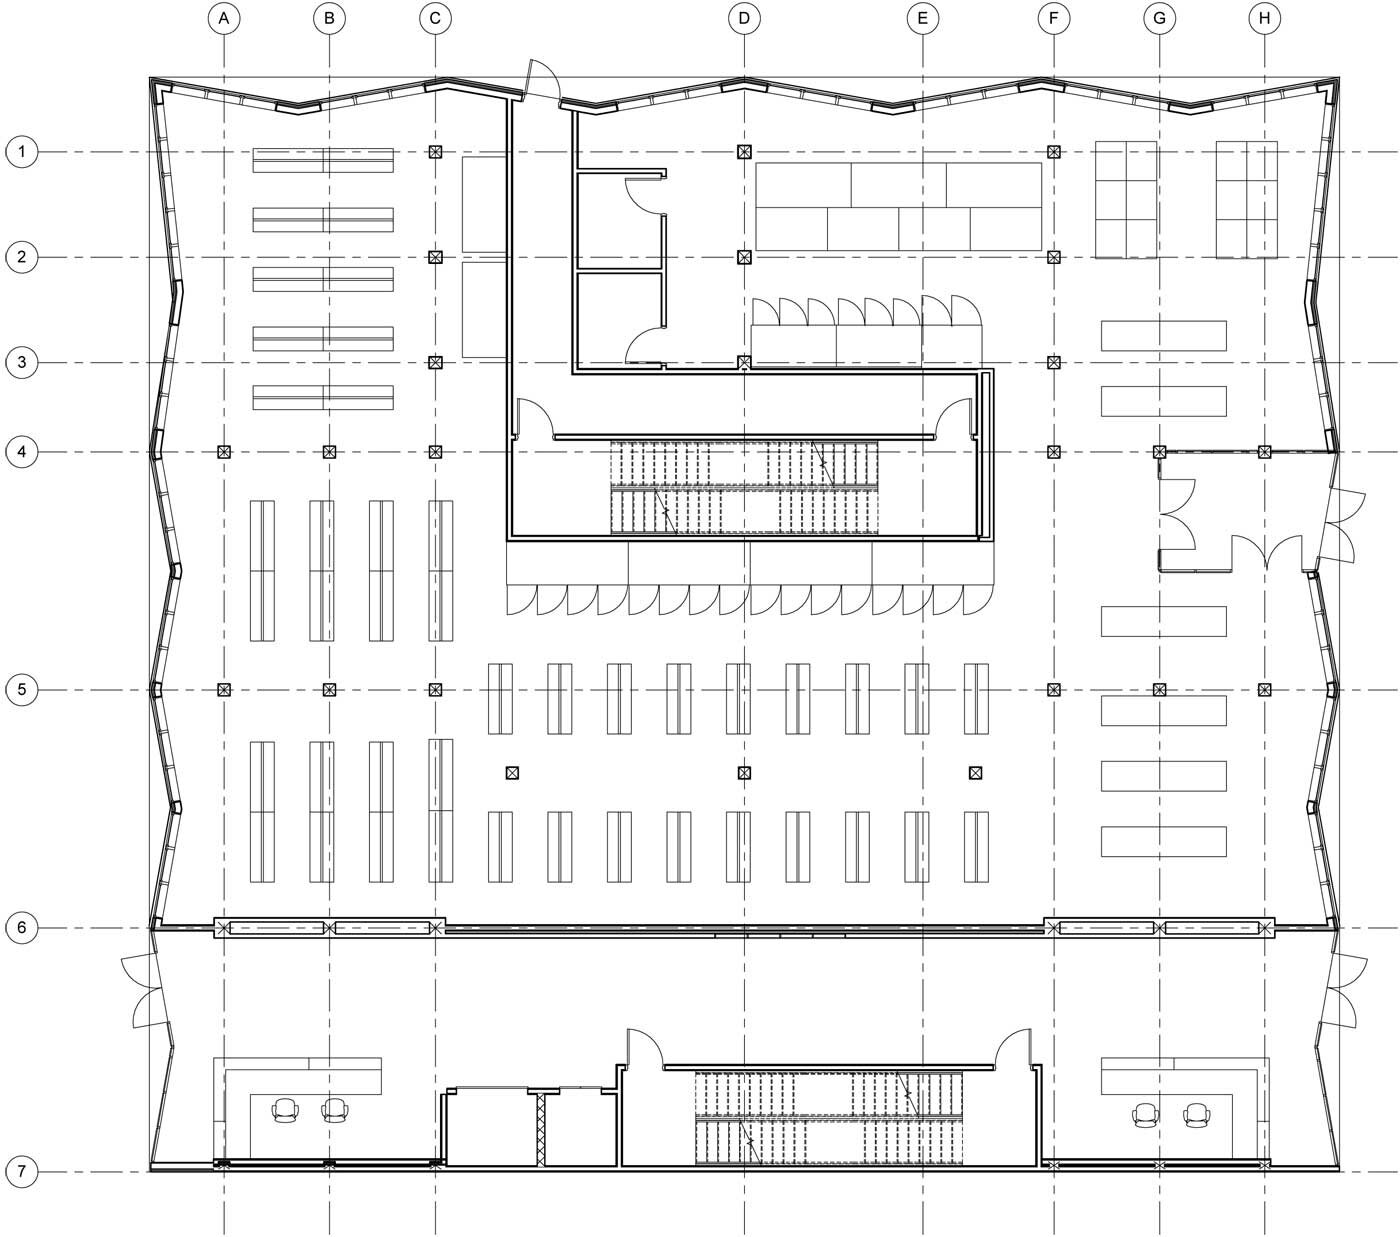
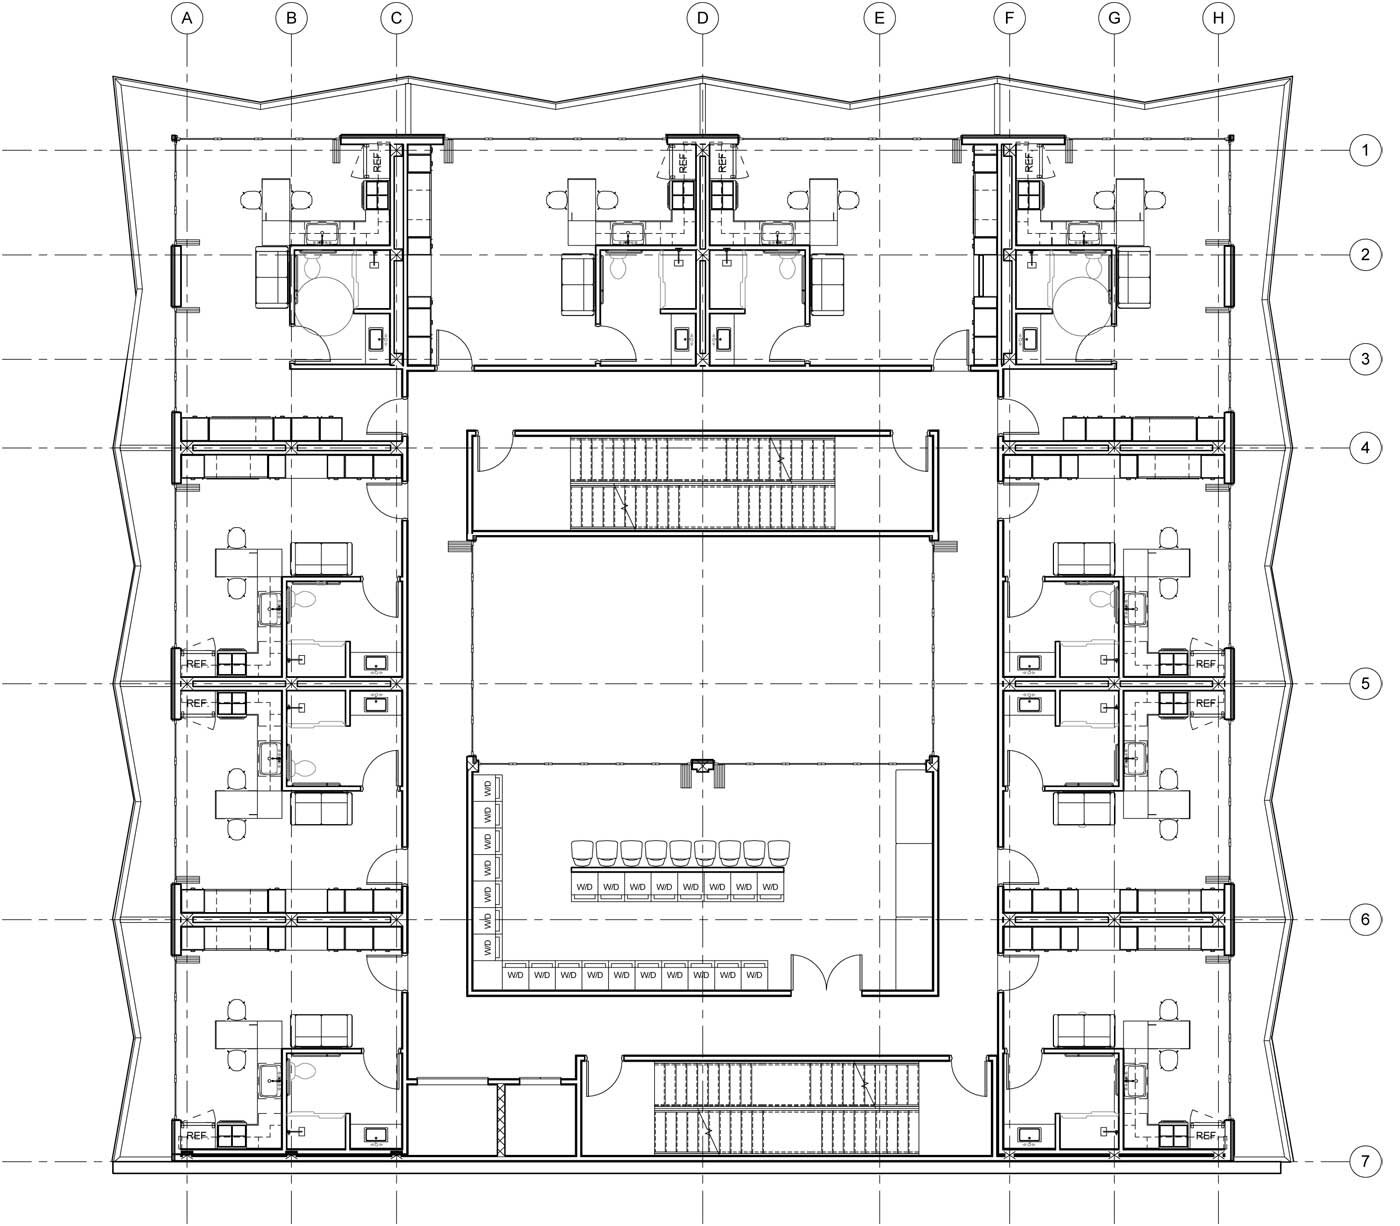
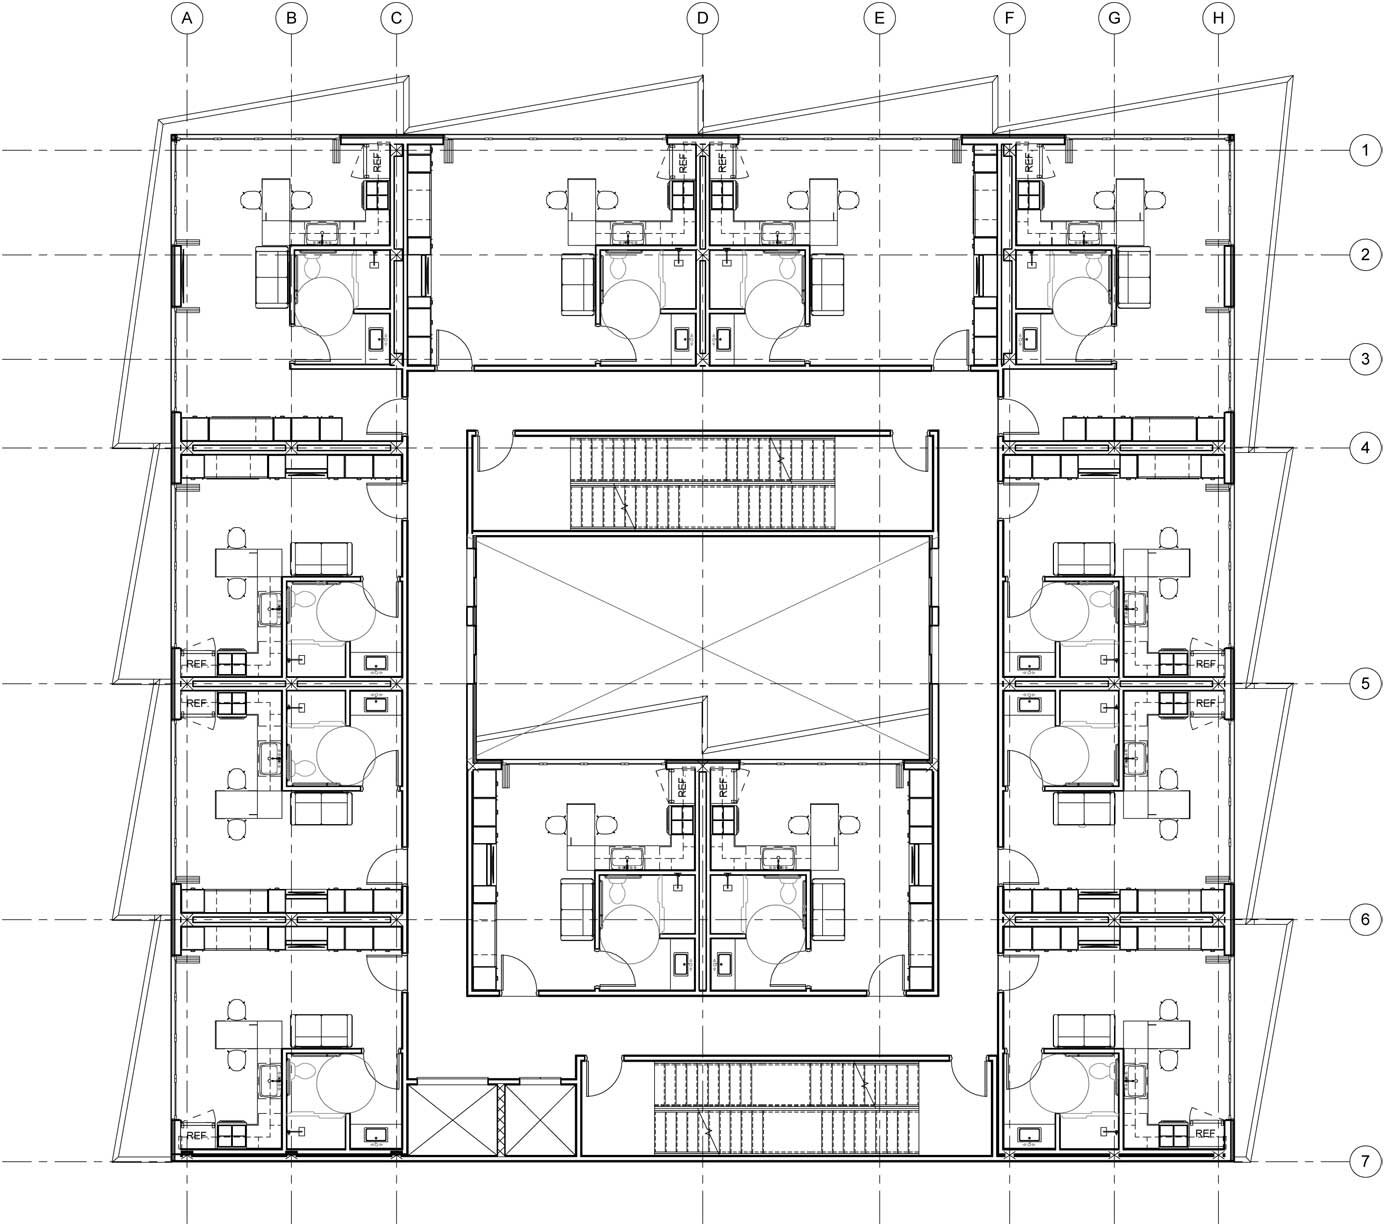
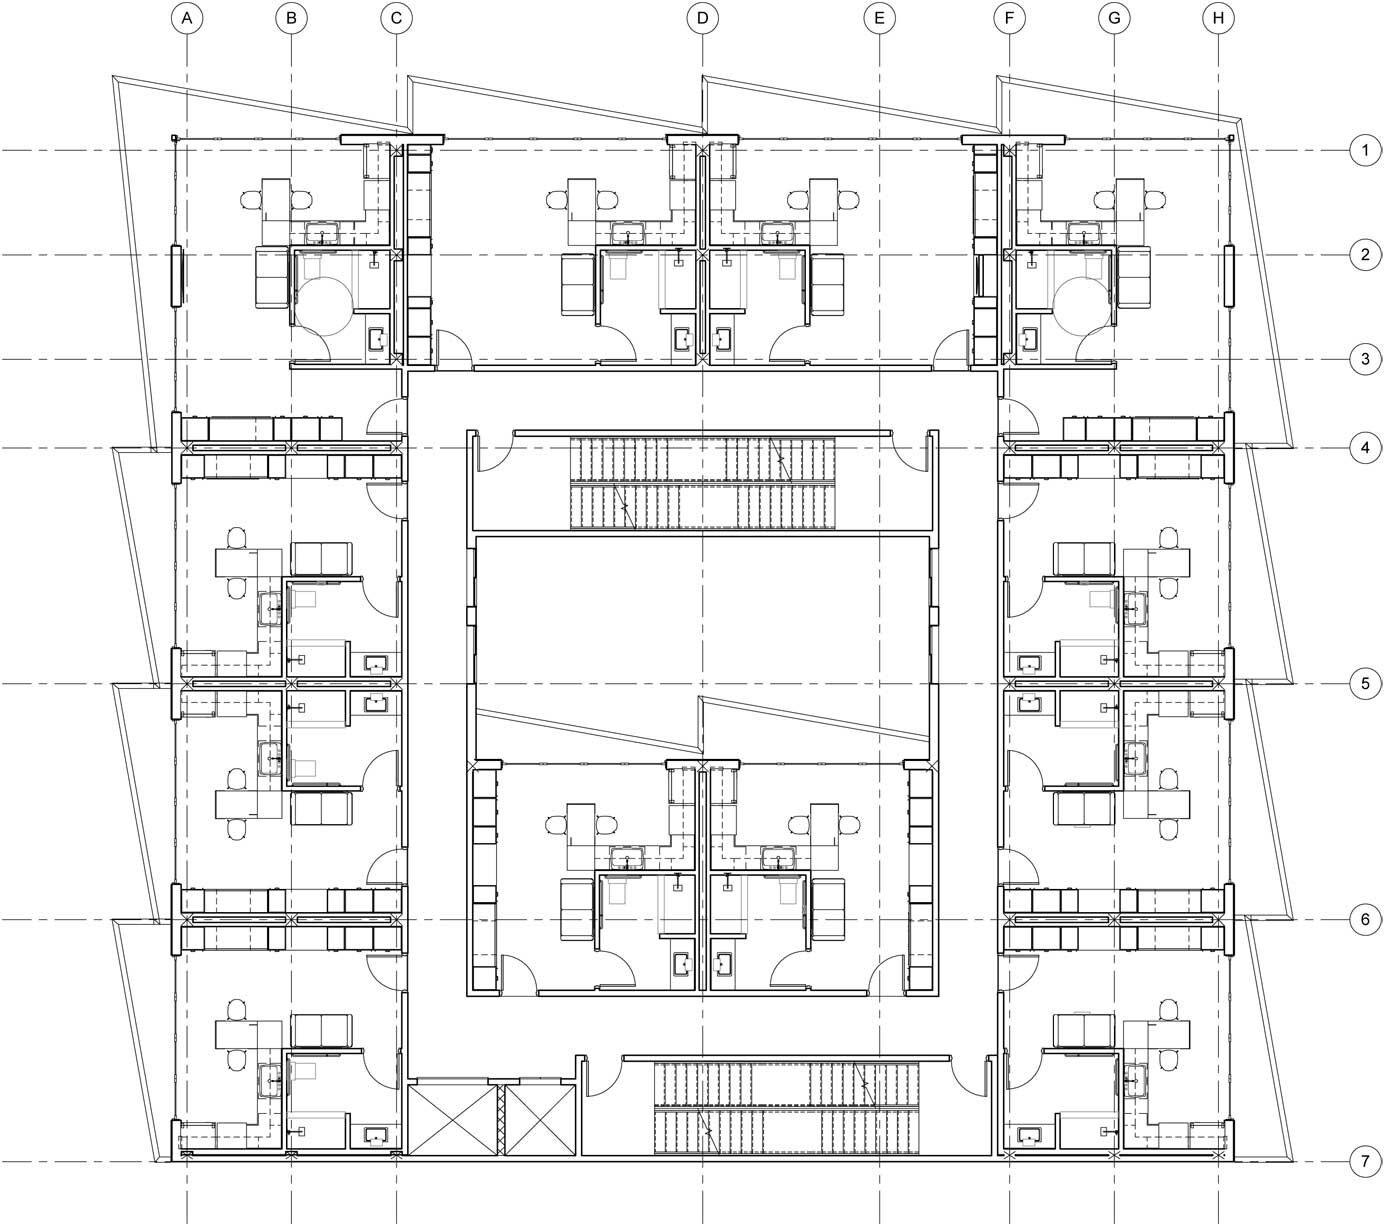
NYC Micro Dwellings' Floor Plans
Next, I focused on exporting each of my floor plans from the ground floor to the fourth floor because the remainder of the building begins to repeat itself with the third and fourth floors. While going through all of the drawings, I realized that they were a little messy and needed some love. I spent an hour going through each floor, correcting invisible grid lines, changing view graphics, and adding any missing furniture to the residential units.
After seeing those floor plans, you might be wondering why I didn’t include a roof plan within the line drawing set. Generally, I would quickly model or draw the roof levels of all adjacent buildings on the site and generate a line drawing site plan. However, I decided to try a different approach and I setup a camera above the building in Revit and focused the perspective downward to create a site plan rendering. I brought this rendering with a Google satellite image in Photoshop and overlaid the two to create a photorealistic site plan.
I struggled with using this visualization as a site plan. I thought that the NYC Micro Dwellings was lost in the overall composition of the site plan. So it would be difficult for someone to look at the site plan and immediately recognize the building. However, I experimented with lowering the saturation of the satellite image, adjusting the brightness and contrast of the NYC Micro Dwellings’ render, and increasing the level of detail in the render using Topaz Labs Adjust. After making these minor adjustments, I found myself staring straight at the rooftop of the NYC Micro Dwellings.
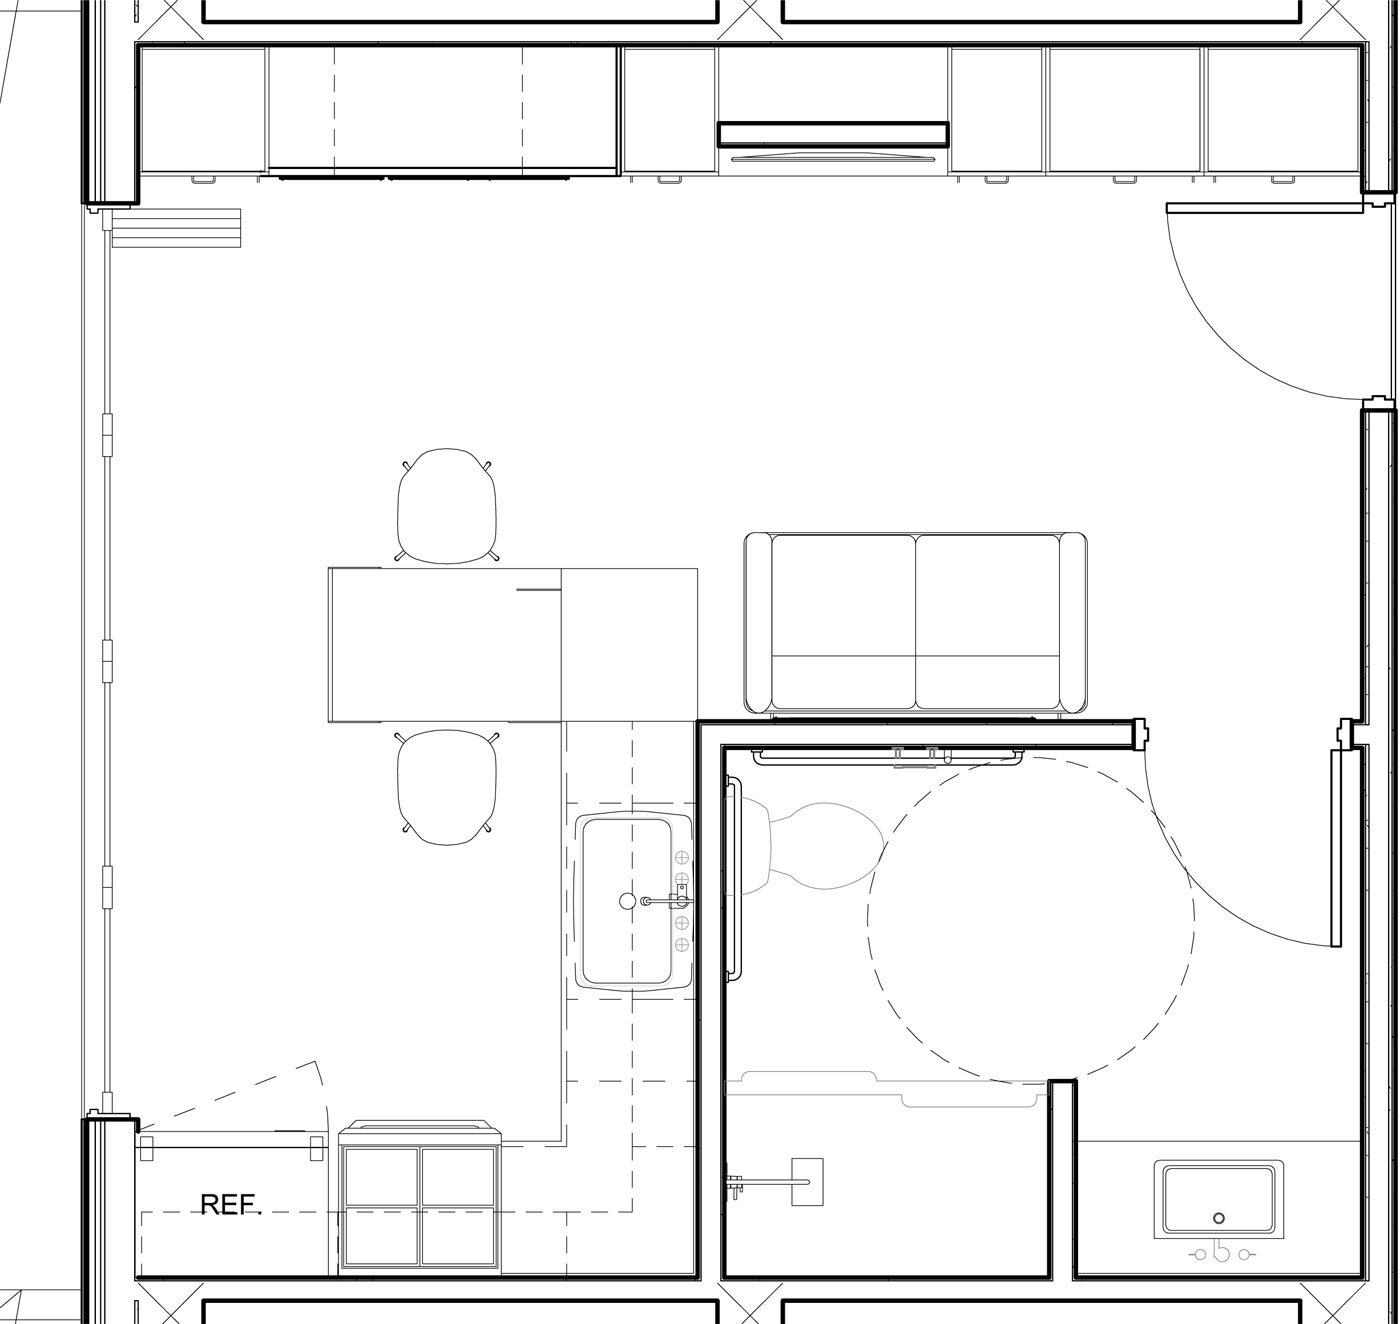
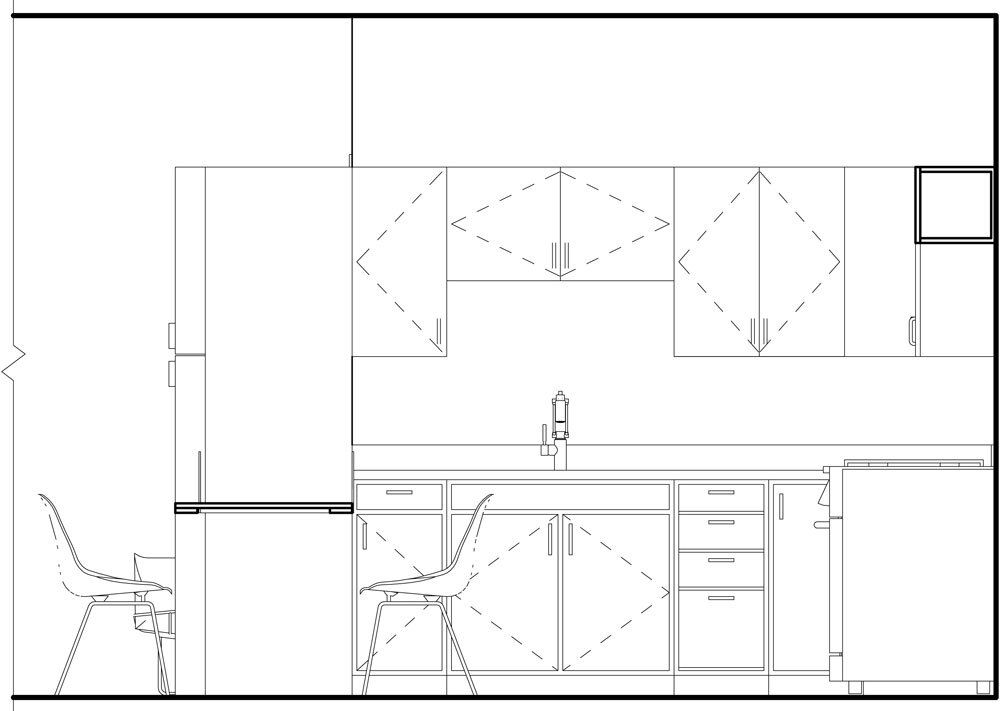
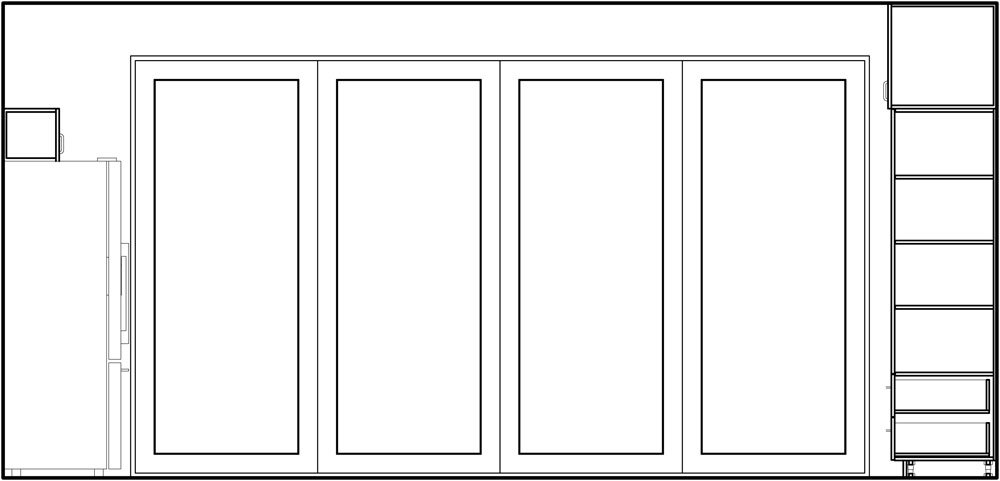
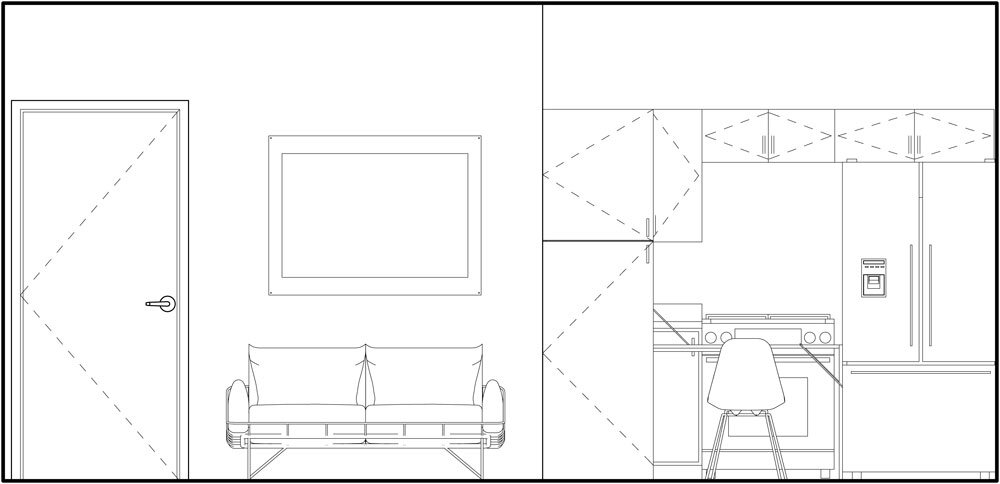
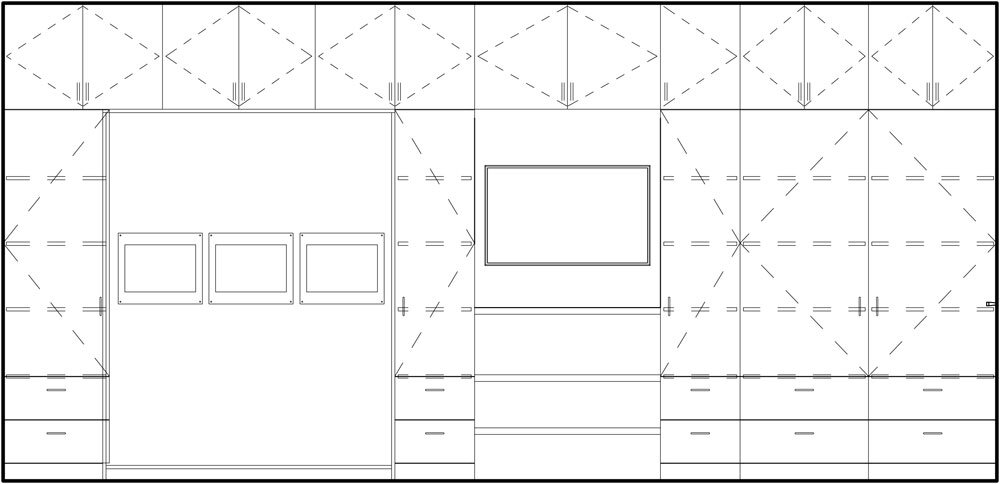
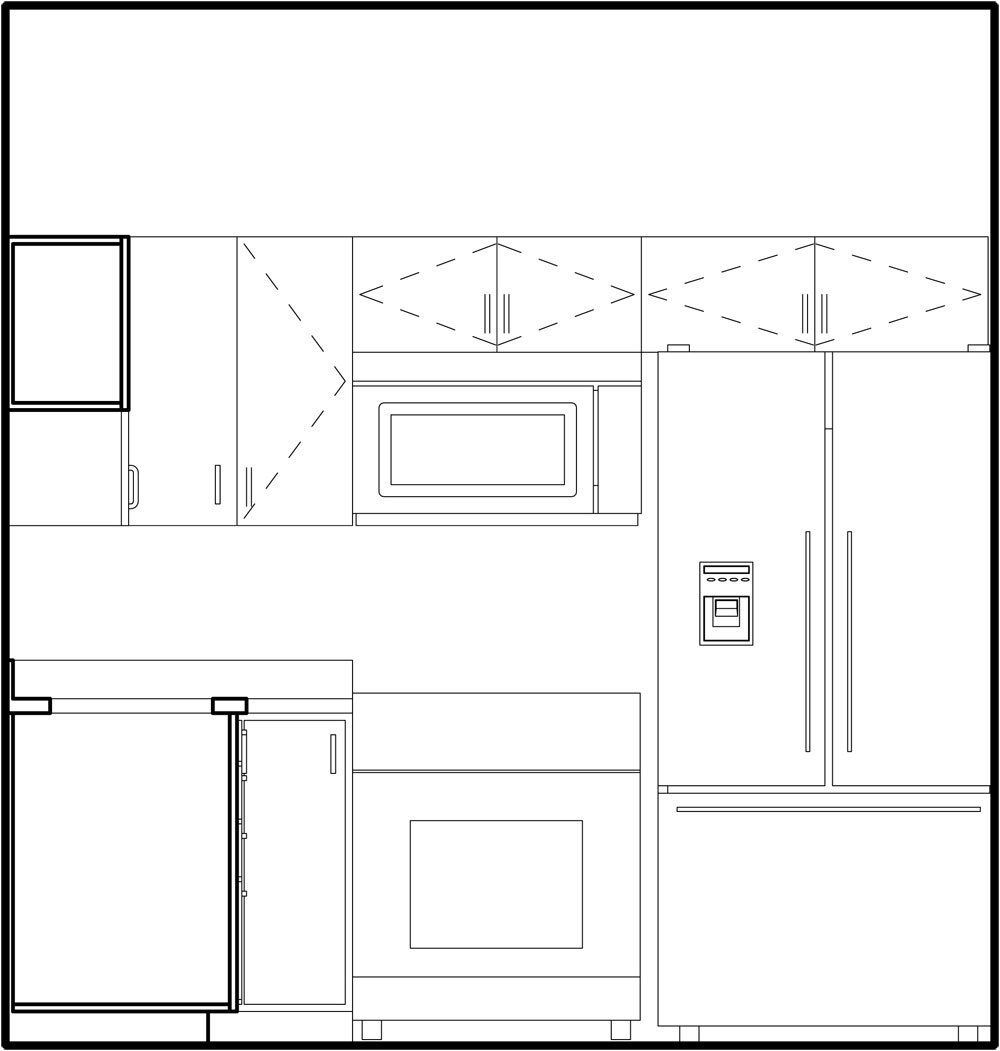
NYC Micro Dwellings' Interior Elevations & Unit Plan
I realized that I haven’t shown any floor plans or interior elevations of the typical residential unit. So the last set of drawings that I compiled was an enlarged floor plan showing the interior layout of a typical unit and its interior elevations of the multi-purpose space, kitchen, and balcony multi-slide door. When paired with the interior renderings, these drawings give a sense of the spatial configuration and uses of a typical unit.
What’s next?
Now that the NYC Micro Dwellings project is developed and I have final documentation, I’ll be putting together either a presentation board or portfolio spreads to showcase the project. This will be my second priority so that I could focus my time and attention on my next three projects, which I plan to start concurrent with one another.